Recipe Spec Sheet (Standardized Recipe): What to Include and How to Build One + Free Template
What a recipe spec sheet (standardized recipe) is, what to include and how to build one step by step: worked costing example, allergens and a free template.
Most kitchens don’t lose money on the big-ticket proteins. They bleed it on the quarter-ounce of herbs a line cook tosses in because “that’s how I like it,” or the inconsistent slice thickness that turns an 8-ounce portion into a 10-ounce pour. That’s not a personnel problem — it’s a documentation problem. A tight standardized recipe isn’t bureaucracy; it’s the single operational document that locks in your concept, your numbers, and your reputation across every shift, whether the exec chef is on the line or on a plane.
In the restaurant-operations world, we call that document a recipe spec sheet. It marries a production blueprint (the standardized recipe) with recipe costing — the line-by-line math that turns raw ingredients and labor assumptions into a live plate cost and a projected food cost %. Stripped of the spec sheet, you’re running a tasting menu every service; with it, you’re running a business.
This guide is the complete spec-sheet playbook: what the document actually is, how it differs from a home-cook recipe, which eight components it demands, how yield math really works, and why allergen documentation isn’t optional — then a step-by-step build, a fully worked costing example, your template options, and the case for a living spec sheet. By the end you’ll be able to rebuild your own sheets with sharper eyes.
ChefBusiness · Real profitabilityMaximize your restaurant without losing moneyCost control and food marketing. Book your ChefBusiness consulting now.Get the consulting →What is a recipe spec sheet (standardized recipe)?
A recipe spec sheet is the authoritative production-and-cost record for a single menu item. It functions as a standardized recipe — a fixed set of ingredients, quantities, techniques, yields, and plating instructions designed to produce the identical dish regardless of who cooks it — fused with a full recipe costing breakdown that calculates the exact portion cost at current market prices.
In a multi-unit or high-volume kitchen, that fusion matters. The standardized-recipe half answers “how do we make this, every time?” The costing half answers “what does it cost us right now, and can we sell it profitably at our menu price?” When both halves live in one living document, training, purchasing, and menu engineering stop being separate conversations and become a single operational loop.
Practically, the spec sheet serves four purposes that a loose recipe card cannot touch:
- Cross-shift consistency — the same yield, plate appearance, and guest experience whether the dish is fired by a 15-year sous chef or a stage on their second day.
- Real-time cost control — because ingredient prices change, a spec sheet tied to live vendor pricing lets you recalculate plate cost without rebuilding the model from scratch.
- Training acceleration — a detailed sheet becomes the training script, shortening time-to-competence and reducing the “just watch me” drift that distorts a menu over months.
- Scalability — you cannot open a second location, launch a catering arm, or onboard a ghost-kitchen partner without a library of spec sheets that make the food replicable and the economics transparent.
Recipe vs. standardized recipe vs. recipe costing: the difference
Kitchen teams use these terms interchangeably, but they describe three distinct levels of operational precision. Before you build a spec sheet, it helps to know exactly which artifact you’re refining — and which one belongs in a binder, in your kitchen software, or on a whiteboard.
| Recipe | Standardized recipe | Recipe costing | |
|---|---|---|---|
| What it answers | How do I make this dish? | How do I make this dish identically every time across any trained cook? | What does one portion cost me today, and what food cost % does that produce? |
| Who uses it | Home cooks, content creators, recipe ideation | Chefs, kitchen managers, trainers, auditors, brand ops | Exec chefs, F&B directors, owners, purchasing, menu-engineering teams |
| Typical contents | Ingredient list + loose method | Ingredient list with precise weights, yields, portion sizes, equipment, plating spec, photo, revision date | All of the standardized recipe fields, plus purchase-unit pricing, AP/EP math, trim loss, yield %, portion cost, and often a target food-cost lane |
| Pricing logic | None | Fixed portion size, no live cost link | Tied to vendor price files, updates dynamically or on a set refresh cadence |
| Primary goal | Inspiration | Replication | Profitability |
A home-cook recipe tells you to “add a handful of spinach.” A standardized recipe tells you “60 g washed baby spinach, loosely packed.” Recipe costing adds “at $0.018/g that’s $1.08 per portion, or 5.4% of a $20 menu price.” A full spec sheet contains all three layers in one document — and it’s the costing layer that turns a kitchen manual into a financial instrument. If you need the deeper walk-through on writing the pure recipe format first, that lives in our recipe format guide. And if the question on your mind is specifically the difference between recipe costing and a spec sheet, I have a guide dedicated to exactly that, with a comparison table and a worked example.
What a recipe spec sheet must include: the 8 essential components
A spec sheet that omits a single field creates a crack for inconsistency — and inconsistency destroys both brand and margin. These eight blocks are non-negotiable for a working kitchen document. Structure them as logical sections, and make every field mandatory before the sheet is considered “live.”
1. Header block — identity and traceability
Recipe name, category (e.g., entrée, pastry, batch cocktail), internal code (tying to your POS and inventory), version number, last revision date, and a full-bleed finished-plate photo. The photo isn’t decoration; it’s the single fastest training reference and the first audit check for expo. Versions matter when you tweak a component — version 3.1 that reduced butter by 10 g needs to be the only copy anyone can access.
2. Yield and portion size
Total batch yield and the portion size it produces, expressed in a weight and a service unit (e.g., “yields ~1 gal sauce; portion = 2 oz ladle, one per plate”). For baked goods and pastry, include scaling weights and piece counts. Without a locked portion size, your plate cost calculation is fiction and your food cost % swings unpredictably.
3. Ingredients with exact quantities
Every ingredient listed by its purchase unit, precise weight (grams or ounces, never “1 bunch”), and the EP quantity if trim is involved. Format: Ingredient name — AP quantity — EP quantity — unit cost — extended cost. This block is the direct input for the costing model.
4. Techniques, cuts, and equipment
Knife-cut specifications (brunoise 3 mm, bias-cut ¼-inch), specific equipment (Hobart with paddle, combi oven at 80% steam), and critical technique notes that affect yield or texture. “Sauté until done” isn’t a specification; “sauté over medium-high heat until internal temp 140°F, approx. 3 min per side” is.
5. Mise en place and prep sequencing
A spec sheet doubles as a prep list. Call out what can be done in advance, what must be à-la-minute, and how components are held and reheated. This section is what converts a new hire from a liability to a productive station cook by day three.
6. Times and temperatures
Cook times, target internal temperatures, hold temps, and chill-down windows. These are both quality and HACCP fields — if they’re missing, your health inspector will notice and your insurance carrier, if they ever audit a food-safety incident, certainly will.
7. Costing block
The live math: AP cost, yield %, trim loss, EP cost, portion cost, and a target food cost % lane calculated against your current menu price. This is the section that turns the spec sheet into a daily decision tool, not a museum artifact.
8. Allergens and storage/shelf life
Mandatory allergen declarations (see section below), plus finished-product storage: container type, shelf life under refrigeration and frozen, and any re-thermalization limits. Seal the document with a “prepared by” and “approved by” signature field.
Grouped visually, the fields often fall into these logical blocks on a template:
| Block | Key fields |
|---|---|
| Identity | Recipe name, category, code, version, date, photo |
| Yield & portion | Total yield, portion size, number of portions |
| Ingredients & costing | Ingredient, AP qty, EP qty, unit, unit cost, extended cost |
| Technique | Cuts, equipment, critical steps |
| Mise en place | Prep-ahead vs. à-la-minute, hold instructions |
| Time & temp | Cook temp/time, internal temp, hot-hold, chill |
| Costing summary | Total batch cost, portion cost, target food cost %, actual food cost % |
| Safety & shelf life | Allergens, cross-contact notes, storage container, shelf life, HACCP CCPs |

AP vs. EP cost: yield, trim loss and your real plate cost
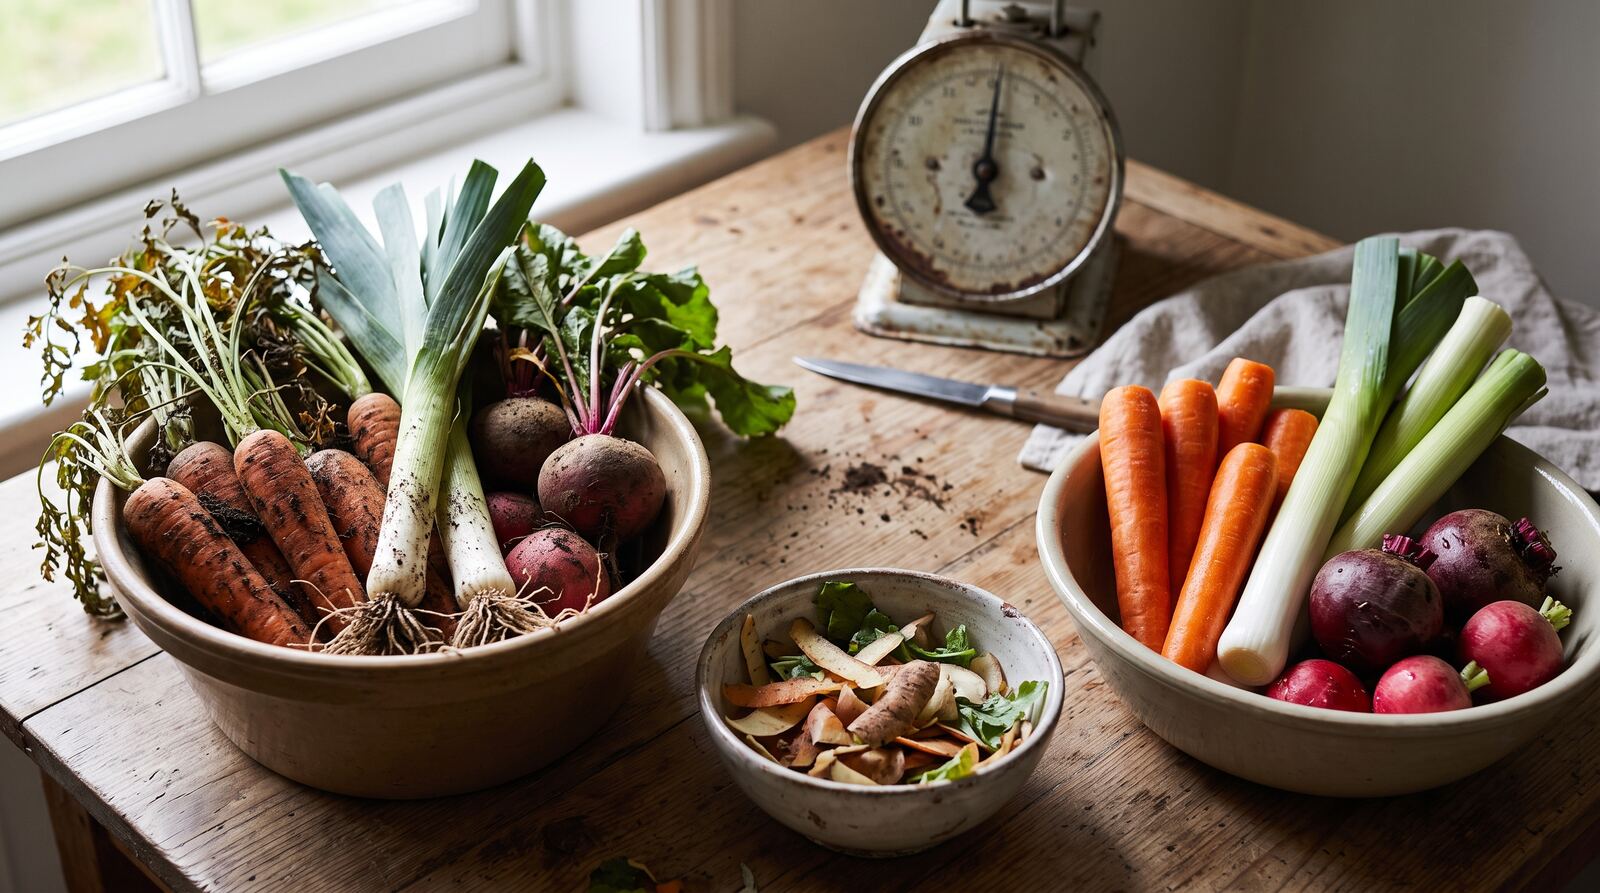
The gap between what you pay for and what actually hits the plate is where margin quietly disappears. As-purchased (AP) cost is the price you pay your vendor for the whole item — a bone-in pork shoulder, a case of untrimmed romaine, a wheel of parmesan with a rind you’ll discard. Edible-portion (EP) cost is the cost of what remains after trimming, peeling, cooking loss, and any other waste that doesn’t contribute to the plated dish.
If you cost a dish using AP weight you’re pretending you serve the trim to guests. You don’t. The yield percentage bridges the two numbers:
Yield % = (EP weight / AP weight) × 100
A mini-example makes it concrete. You buy a 10 lb whole beef tenderloin at $12.00/lb — that’s $120.00 AP. After trimming the chain, silverskin, and fat cap, you have 7.5 lb of clean, center-cut tenderloin (your EP). The yield % is (7.5 / 10) × 100 = 75%. Your trim loss consumed 2.5 lb, or 25% of the purchase weight. The EP cost per pound isn’t $12.00; it’s $120.00 ÷ 7.5 = $16.00/lb.
That $4.00/lb difference, multiplied across every trimmed ingredient on your menu, is the delta between a plate cost you can defend and one that understates reality by 10 to 15% across a full menu mix. A yield table — with typical trim-loss ranges for your core proteins, veg, and fabricated seafood — installs guardrails so that every spec sheet uses realistic EP costs instead of aspirational ones. We keep an edible-portion yield table ready as a starting reference for standard proteins and produce.
The conversion factor (sometimes called a yield factor) is the inverse logic: 1 / yield %. If your tenderloin yield is 75%, the conversion factor is 1 / 0.75 = 1.33. That means for every pound of EP tenderloin you need on the plate, you must purchase 1.33 lb AP. Build the conversion into your spec-sheet costing block and vendor-price changes flow through to your portion cost automatically.
AI Chef Pro · AI for chefs55+ AI tools for your kitchenCreate recipes, menus and optimize costs free. Try AI Chef Pro now.Try it free →Allergens and HACCP: what to document on every spec sheet
Allergen documentation is not a marketing footnote — it’s a legal, operational, and brand-safety requirement. In the US, the FDA mandates clear identification of the Big 9 major allergens: milk, eggs, fish, crustacean shellfish, tree nuts, peanuts, wheat, soybeans, and sesame (sesame added by the FASTER Act, effective January 2023). Every spec sheet must call out which of the nine are present in the dish as prepared, including sub-ingredients — the anchovy in the Worcestershire, the butter solids in the roux, the wheat in the soy sauce.
Equally important is cross-contact risk: if a fryer oil also processes a battered wheat product and you’re frying a gluten-free item in it, that’s not a gluten-free plate. Note it on the sheet. Servers cannot answer allergy questions accurately unless the kitchen has documented the ground truth at the recipe level.
On the HACCP side, your spec sheet should carry the food-safety fields that matter for your plan: critical control points (CCPs), target internal cook temperatures, hot-hold minimums (135°F), and cooling windows (70°F to 41°F within 4 hours in standard two-stage cooling). If you’re using batch codes or prep dates for traceability, those fields belong here too. One tiny note for international readers operating across borders: the EU requires labeling of 14 allergens under Regulation (EU) 1169/2011 — for any product exported or a concept expanding to an EU market, you’ll need the additional five (celery, mustard, lupin, molluscs, and sulfur dioxide/sulfites). But for US kitchens, the Big 9 are the floor, and clear documentation on every spec sheet is what keeps you on the right side of a guest incident — and your liability carrier.
How to build a recipe spec sheet step by step
You have the why. Now the how. Building a tight spec sheet isn’t a creative exercise — it’s a discipline. But if you follow these steps once per plate, you end up with a document your whole team can actually use, and a plate cost you can trust.
-
List every ingredient with its as-purchased (AP) quantity
Start with the exact product you’ll order — brand, pack size, trim spec. For example, “80/20 ground chuck, fresh, not frozen,” not just “beef.” Write the AP weight or count for the batch size you’re standardizing (single portion, a 6-pan batch, a full hotel pan). If an ingredient comes in a unit — like 1 egg or 4 slices bacon — record the unit and the AP weight you used to cost it. Be obsessive; missing a pinch of salt won’t sink your food cost, but forgetting the 2 tbsp of butter you baste with absolutely will. -
Measure trim and cook loss, then record the edible-portion (EP) weight
Weigh each ingredient before and after prep — trimming, peeling, cooking, resting. Compute the yield percentage: EP weight ÷ AP weight. Do this under real kitchen conditions, not in a test kitchen with perfect everything. The beef patty that starts at 8 oz might finish at 6.3 oz after the broiler gives up its fat and moisture — that’s a 79% yield. Write that number down. It belongs on the sheet because it’s what turns AP cost into something meaningful. -
Cost each ingredient at its real EP cost
Convert the purchase price into the cost per ounce, pound, or each, then divide by the yield percentage to get the true edible-portion cost. Don’t cost 8 oz of raw beef at the invoice price per pound — cost the 6.3 oz you’re actually plating. We walk through the full line-by-line math in how to cost a recipe step by step; here, the point is that every cost on the spec sheet must be EP, never AP. -
Sum the total recipe cost
Add up every ingredient’s EP cost for the batch. If you’re working in single-portion terms, that’s your recipe cost for one plate. If you’re standardizing a batch that yields 12 portions, divide by 12 now to get the per-plate cost. Round responsibly — a tenth of a cent won’t hurt, but loose rounding across 15 ingredients can shift your margin by a full percentage point. -
Calculate plate cost and food cost percentage
The plate cost is the total EP cost per portion. Set a target food cost percentage (say 28%) and divide:plate cost ÷ target food cost % = menu price (pre-tax). That’s the baseline. When the target changes or ingredient costs drift, you revisit this line. Use the menu price calculator to play with thresholds, and the food cost calculator to see how small cost shifts ripple across the menu. -
Add allergens and storage requirements
List every FDA Big 9 major allergen present in the recipe: milk, eggs, fish, crustacean shellfish, tree nuts, peanuts, wheat, soybeans, and sesame. Do it ingredient by ingredient, not dish-level guesswork — “contains: wheat, soy, sesame” is what you need. Note if cross-contact is possible from shared equipment. For HACCP food-safety fields, record the critical control points (cook-to temperature, hold temp, cooling window). Finally, specify storage: shelf life, container type, cooler temp, and any prep-ahead instructions. -
Add a photo and service notes
A single clear photo — shot in the kitchen under real plating conditions, not a styled studio shot — anchors the spec. Below it, add two or three lines of service notes: pickups, garnish placement, the one thing the expo needs to check before the plate goes out. This turns the sheet from a costing tool into a training document every cook can glance at mid-rush.
A worked example: real plate cost (house BBQ burger)
Ingredients for a single House BBQ Burger, following the steps above. AP weights reflect what you actually pull from the walk-in; yields were measured over five test cooks and averaged.
| Ingredient | AP weight | Yield % | EP weight | Cost |
|---|---|---|---|---|
| Brioche bun | 1 each (3.2 oz) | 100% | 1 each (3.2 oz) | $0.38 |
| 80/20 ground chuck | 8.0 oz | 79% | 6.3 oz | $1.15 |
| Sharp cheddar slice | 0.8 oz | 100% | 0.8 oz | $0.22 |
| House BBQ sauce | 1.2 oz | 100% | 1.2 oz | $0.11 |
| Smoked bacon (2 slices) | 1.2 oz | 32% | 0.38 oz | $0.28 |
| Crispy onion ring | 1.5 oz | 93% | 1.4 oz | $0.09 |
| Lettuce leaf | 0.5 oz | 90% | 0.45 oz | $0.04 |
| Pickle chips | 0.6 oz | 100% | 0.6 oz | $0.06 |
| Butter (toast bun) | 0.25 oz | 100% | 0.25 oz | $0.05 |
| Total | $2.38 |
With a target food cost of 28%, the menu price is straightforward: $2.38 ÷ 0.28 = $8.50 (pre-tax, as all US menu prices are). That leaves a 72% gross profit margin to cover labor, occupancy, and overhead. The math only holds if the yields and purchase prices stay where they are — which is why you compare theoretical plate cost against actual performance using theoretical vs. actual food cost. When supplier prices move or the barbecue sauce yield slips, the plate cost walks. The food cost calculator and menu price calculator help you re-anchor that $8.50 quickly.

Recipe spec sheet templates: Excel, Google Sheets, PDF or software
The format you choose dictates how much time you’ll spend maintaining your spec sheets — and how current your plate costs actually are.
| Format | Pros | Cons | Best use case |
|---|---|---|---|
| Excel | Familiar; powerful with formulas; offline | Version chaos; manual price updates; no live inventory link | Single-unit where one person owns the file; smaller menus |
| Google Sheets | Cloud-based; real-time sharing; free | Still manual data entry; breaks with heavy formatting; no native food cost automation | Small teams needing quick collaboration; pop-ups, food trucks |
| Printable PDF | Kitchen-proof; consistent look; easy to laminate | Static; stale the moment printed; re-costing means regenerating | Sites that change the menu seasonally; archive reference |
| Dedicated kitchen software | Auto-costed from live ingredient prices; yields updated once; linked to P&L; photo and allergen fields built in | Requires onboarding; paid subscription | Multi-unit groups, commissaries, ghost kitchens, any operation where plate cost moves weekly |
A printed PDF spec sheet works fine if you run a static menu and re-cost quarterly. But if you’re managing delivery-only brands, contract catering, or central kitchens that send prepped food to multiple outlets, you need the software column. Start from our free recipe spec sheet template to see the components laid out, then decide whether spreadsheets will carry you or whether you’re ready for something that stays alive.
From a static sheet to a living spec sheet: why your plate cost changes every week
Even if your recipe hasn’t changed in months, your plate cost is not a fixed number. It moves every time a supplier price shifts, a delivery arrives with smaller-than-usual trim, or a cook changes how they portion. A spec sheet built on last quarter’s invoice prices is a historical document, not a management tool.
A static template — whether it’s an Excel file saved to a desktop or a laminated sheet stuck to the prep table — goes stale the day you accept a price increase on ground chuck. If you don’t update the cost on the sheet, your theoretical food cost becomes a lie, and the gap between that number and your actual cost from the daily P&L widens. You’re flying blind until the monthly inventory reconciliation slaps you with a 34% food cost instead of the 28% you expected.
A living spec sheet solves this. When the ingredient costs and yields live in the same system that powers your ordering and invoices, the plate cost recalculates automatically. Change the AP price for brioche buns once, and every spec sheet that uses that bun updates — immediately. Your food cost percentage adjusts, your menu price threshold alerts you if the margin compresses, and your daily P&L reflects what’s actually happening. See it in action for the workflow that turns a static recipe into a real-time financial lever.
If you’d rather your spec sheets do the math for you instead of chasing spreadsheets, you can try Miselup and watch a plate cost recalculate in seconds.
Timlup · Team on trackDaily checklists & tasks for your restoKeep your team on point with recurring tasks. Meet Timlup and simplify operations.Meet Timlup →
Frequently asked questions
What is a recipe spec sheet?
A recipe spec sheet is the operational blueprint for a dish — it captures the exact ingredients, quantities, preparation method, costing, allergen declarations, and food-safety information in one document. In a professional kitchen, it replaces loose recipes with a standardized, trainable resource that protects both consistency and margin.
What should a recipe spec sheet include?
At minimum, a spec sheet should list the recipe name, yield and portion size, a full ingredient list with AP and EP weights, unit costs, total recipe cost, plate cost, food cost percentage, step-by-step preparation, a quality photo, allergen statements for the FDA Big 9, HACCP control points, and storage instructions. That’s the core eight-component framework we cover earlier in this article.
What’s the difference between a recipe and a standardized recipe?
A recipe is a general set of cooking instructions — often imprecise in quantities and yield. A standardized recipe is the exact, kitchen‑tested version: it specifies exact AP and EP weights, portion size, equipment, and method so that any trained cook can reproduce the identical dish, cost, and quality every time.
What’s the difference between recipe costing and a spec sheet?
Recipe costing is the financial exercise of calculating the cost of goods for a dish. A spec sheet is the broader operational document that contains that costing alongside the preparation steps, allergen details, and safety notes. You can cost a recipe without building a proper spec sheet, but a complete spec sheet always includes the costing as one of its layers.
How do you build a recipe spec sheet step by step?
Start by listing every ingredient with its AP quantity. Measure trim and cook loss to get the EP weight and yield percentage. Cost each ingredient at its true EP cost, then sum to get the total recipe cost. Divide down to plate cost, set your target food cost percentage for the menu price, add allergen and HACCP fields, and finish with a photo and concise service notes. The full guide walks through each stage in detail.
Do I have to list allergens on a spec sheet?
Yes, absolutely. Include every ingredient that contains any of the FDA Big 9 major allergens: milk, eggs, fish, crustacean shellfish, tree nuts, peanuts, wheat, soybeans, and sesame. If you operate internationally, you may also need to declare the 14 allergens required under EU Regulation 1169/2011. A properly filled allergen field protects both your guests and your liability.
What is AP weight vs. EP weight?
AP (as-purchased) weight is the weight of the ingredient exactly as it comes from the supplier — bones, peel, trim, and all. EP (edible-portion) weight is what’s left after you remove inedible parts and account for cooking loss, and it’s the weight you use to cost the plate. The ratio between them (yield%) is the key to accurate recipe costing.
What format should a recipe spec sheet be in: Excel, PDF or software?
It depends on your operation. PDFs work for seasonal, static menus with infrequent price changes. Excel or Google Sheets give you auto‑calculation but still require manual updates when prices or yields shift. Dedicated kitchen software keeps the spec sheet alive, auto‑costing from live ingredient prices and feeding directly into your daily P&L — the right choice when plate cost moves weekly across multiple units.